Showing posts with label yum. Show all posts

Tuesday, November 12, 2013

Easy Salted Caramel Sauce

 photo caramel1_zps3bdc519d.jpg


Recently, a friend asked me what in the world drives me to make these random recipes? I mean it's a valid point, just go to the grocery store and pick up a 2 dollar jar of caramel, pickles or jelly and call it a day. This blog is my way of doing things I've always wanted to do or have never done before. I've found I enjoy a good challenge. I can get bored with the mundane and learning new things is my fuel. Perhaps this is the modern day cookbook I'm keeping for myself. I don't have a powerful or rational reason why I blog...I just like to :)

I made this sauce in the spirit of Halloween, caramel apples and all things sugary. It went over really well at our pumpkin carving party and my roomie made apple chips to dip. YUM! Yes, it's post-Halloween but I think caramel sauce will still be a great dip or drizzle for those holiday parties coming up. It's a bit of a tricky technique, but if you're patient enough, the results are phenom. Another reason I love this... is the short ingredient list! You have to stay close, because it can go from beautiful to burnt in a matter of seconds.


Prep Time: 2 minutes
Cook Time: 15 minutes
Total Time: 17 minutes
Yield: 1 1/2 cups

Ingredients:

1 cup sugar

6 tablespoons unsalted butter, cut into chunks

1/2 cup heavy whipping cream
1/4 cup water
1 1/2 teaspoons sea salt (I prefer Maldon sea salt flakes or fleur de sel)


Preparation
  1. Heat sugar and water in a 2-quart or 3-quart saucepan over medium-high heat. Stir to help the sugar dissolve, but stop stirring when the sugar comes to a boil. You can swirl the pan a bit if you want.
  2. When the liquid sugar hits a dark amber color, add all the butter to the pan. The mixture will foam up and thicken. Whisk until the butter has melted. Once the butter has melted, take the pan off the heat.
  3. Add the cream to the pan (the mixture will foam up again) and continue to whisk to incorporate.
  4. Add the sea salt and whisk until caramel sauce is smooth. (Note: if making Bourbon Salted Caramel Sauce, add 3 tablespoons of bourbon at this time.)
  5. Let cool in the pan for a couple minutes, then pour into a glass jar and let cool to room temperature. Don't worry if the sauce seems a bit too thin at first, it will thicken as it cools. Store in the refrigerator for up to 2 weeks. Warm before serving to loosen it up again.
*recipe acquired from Lick My Spoon


Thanks for reading and stay tuned for more DESIGN-ey posts...I'm trying to stop posting recipes but I can't hide my foodie side...

xo


Monday, September 2, 2013

Strawberry Jalapeño Jelly


 photo straw001_zps14417b36.jpg 

If I can, you can...

The dog days are not quite over! I tried a spicy and fruity summer recipe that is perfect for hot weekends, better spent indoors. Let's face it, it's flippin HOT outside, ya'll. Since my pickle post was so successful, I wanted to give another lesson on preserving sweet SUMMER:) Thanks so much for the sweet comments and emails. Please let me know if you get a chance to use this recipe!

I know I call this a recipe but I didn't realize CANNING was such a sport! I'm talkin' special pots, gadgets and devices.

I remember raiding my grandmother's garden and making blackberry jam with her when I was little...it was grand-daughter bliss and a memory I'll always remember.
Since I'm just a poor twenty-something girl living in an apartment, I rely on farmer's markets and the HEB fruit section for my fresh berries:) One day I'll be picking my own fruits and veggies from my own little garden...one day.


There are 4 simple steps in this process: Prepping + Cleaning + Cooking + Cooling.

*PS: I recommend watching a couple of YouTube videos to really understand the process of canning. 
  
   photo straw1_zps8c7eeb68.jpg photo straw3_zps2f883c49.jpg
 photo straw2_zps87d54b8e.jpg  photo straw4_zps55eaa238.jpg  photo straw9_zps63b0ddb4.jpg  photo straw8_zps9185bbcd.jpg 
   photo straw7_zps0f2d1805.jpg

 photo straw10_zps10ea65ee.jpg 
 photo straw11_zpsd0a1a5b1.jpg

 INSTRUCTIONS:


[Yield: 8 half-pint jars]
recipe acquired from food.com - click here to change yield

4 cups strawberries, crushed (discard stems and leaves)
1 cup jalapeno pepper (processed in food processer)
1/4 cup lemon juice
1 (1 3/4 ounce) package powdered fruit pectin (Sure-Jell Premium yellow box I prefer using 1 1/2 packages because strawberries are runnier)
7 cups granulated sugar (yes this is the right amount...it's jelly!)
1 tsp cayenne pepper (optional aka MY SECRET TOUCH)
1/2 tsp. butter


1.  Place the crushed strawberries (do not chop in a food processor; the texture will be too fine and choppy), processed jalapeno pepper, lemon juice and pectin into a large, heavy-bottomed saucepan; stir in the sugar to dissolve. Rapidly bring to a boil over high heat (long, slow boiling destroys the pectin). Once at a full rolling boil, cook for 1 full minute. One half teaspoon butter may be added to keep down the foam, if desired. Letting this mixture sit for about 5 minutes discourages the fruit from separating.

2. Sterilize eight half pint canning jars with lids and rings, boiling for at least 5 minutes and kept hot.
3. Pack the jam into the hot, sterilized jars, filling the jars to within 1/4 inch of the top. Run a knife or a thin spatula around the insides of the jars after they have been filled to remove any air bubbles. Wipe the rims of the jars with a moist paper towel to remove any food residue. Top with lids and screw on rings. Don't screw too tight...

4. Process 10 minutes in a boiling water canner. Remove the jars and place onto a cloth-covered or heat-resistance surface. (While cooling, I shake frequently to redistribute content.) Allow to cool overnight. Store in a cool, dark area.


I made a little label and added some personal touches to give as a gift...the more personal the better! Good luck and don't burn your tongue doing a taste test, trust me:)


Sunday, August 18, 2013

Sweet and Spicy Pickles

 photo p10_zpsbe494ad4.jpg photo p11_zps52960820.jpg photo p3_zps61fcbfb2.jpg photo p4_zps1403d061.jpg photo p8_zpsbfc1f03a.jpg 
 photo p9_zps30315603.jpg 

Preserving sweet summer...

 This weekend I celebrated National "Can it Forward" day! Who knew? As the summer season is bitter-sweetly fading away (buh-bye triple digits), this is a way to PRESERVE your in-season fruits and veggies. After scouring the farmer's market Saturday morning, I decided to make pickles and jam (I will hopefully post the jelly recipe soon!). I found this recipe for "quick" pickles...meaning you can enjoy them 2-24 hours after canning them. Whereas typically, they take about a week to pickle.

The important part is properly prepping your veggies....
For cucumbers, slice to the size you desire and place on a layer of course salt and paper towels (I did this on a baking sheet). Next, top with a layer of coarse salt and let sit for 15 minutes. After time is up, pat veggies dry. For the pearled onions, we soaked them in ice cold water for 10 minutes before peeling. The process varies with whatever veggie you are pickling. Here's more information from Miss Martha.

Lets get picklin'!

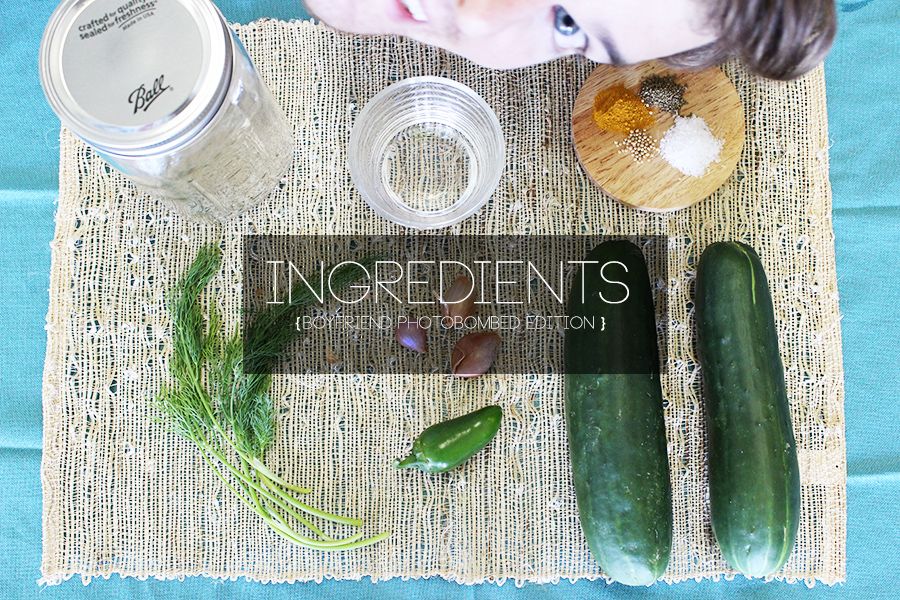
Ingredients:
3 c. white vinegar
1 1/2 c. sugar
2 teaspoons course salt
3 pearled onions
1/2 teaspoon mustard seed
1/2 teaspoon celery seed
1 jalapeno (optional)
1/8 teaspoon ground turmeric
1 1/2 c. fresh dill fronds (about one bunch)
_____________

For Brine:
In medium saucepan combine vinegar, sugar, salt, mustard seed, celery seed, turmeric and bring to a boil. Stir constantly to dissolve sugar.
_________________

Next, arrange fresh dill fronds into jar with prepared cucumbers. Pour hot brine into jar to completely cover the cucumbers. Seal and refrigerate. Enjoy when cold!
_____________________

My only regret...not making more!! If I haven't mentioned already, I'm a HUGE fan of spicy foods so my boyfriend and I left all of the jalapeno seeds in. It was just the right amount of hurt so good - as they say. The vinegar balances out the spice so don't be scared:)

Happy canning!


Sunday, August 11, 2013

Perfect Pesto Pasta

 photo pasta_zps691e4804.jpg 

Happy Sunday,  friends! 

After a wonderful weekend spent with family (my rents came in town!) and friends I am pooped! In a good way of course... But I always feel like my weekends fly by. One of my favorite ways to spend Sundays involves the kitchen (and the couch when football season is here). This pasta dish is super easy and one of my favorite go-to's for something light but filling. It's always a crowd pleaser and it can be served warm or cold. I hope you guys enjoy!

Ingredients:
feeds: 4 hungry humans
  • 2 sliced chicken breasts
  • 8 oz. bowtie pasta (cooked)
  • 1/4 c. chopped artichoke hearts
  • 1/2 c. sliced sun-dried tomatoes
  • 1/4 c. chopped kalamata olives (these add major zing!)
  • 8 oz. pesto sauce
  • 1 c. fresh basil leaves
  • salt and freshly ground pepper to taste


This ingredient list is never set in stone. I'm always adding a few more sun dried tomatoes when no one is looking...and the kalamata olives are a bit strong so sometimes I skimp on those. If you want fresh tomatoes instead of sun dried, go for it!

Instructions:
Cut the chicken breasts into bite sized pieces. Saute in a shallow pan. In a separate pot, add the pesto sauce to your noodles and stir until evenly distributed. Fold in artichokes, olives and tomatoes and cooked chicken. Chop or tear your basil leaves into small pieces and top each dish as a finishing touch. Add salt and pepper to taste.

The pesto sauce gives the pasta that oily texture with a delicious flavor. I'm determined to whip out my food processor and make my own pesto sauce.. another day, another post! Thanks for reading:)


Texas Women Bloggers
{This post is linked to the TWB weekly link party!}

Thursday, July 25, 2013

Cherry Almond Crumble

 photo Cherry1_zpseeea9e58.jpg photo Cherry2_zps59640e6a.jpg photo Cherry3_zpsc6b81a2c.jpg


 photo Cherry5_zpsecc4bd71.jpg
 photo Cherry4_zps107fed00.jpg
 photo Cherry6_zps32cb86ec.jpg

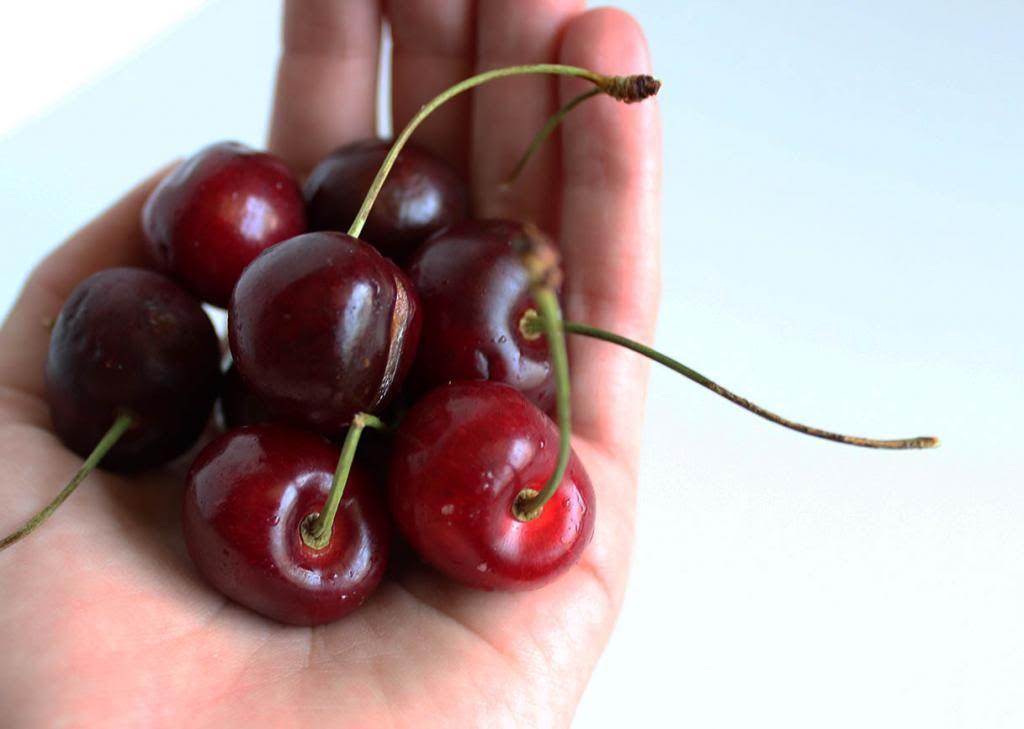
When I told my boyfriend what was cookin' he had no idea what a "crumble" was ...typical. But you ladies know, right!? Another word I would use would be a "crisp"! Call it what you will, this treat is amazing especially when you're using in-season FRESH fruits. This is a perfect summer dish and the cherry almond combo is killer.

If you follow me on instagram, you may have noticed how super excited I am about my new photo gear... I'm not quite ready for the dog/hubby/kids phase of my life so I got a really awesome camera instead:) Photographing and editing this for me was SO fun! I have to resist taking my camera everywhere! Anyways, I hope your eyeballs enjoy themselves...

Now, let's get cookin! 


Cherry Filling
1 1/2 lbs (0.7 kg) dark sweet cherries, pitted and halved
1/4 cup (50 grams) brown sugar, packed
2 teaspoons cornstarch
1 tablespoon brandy or dark rum (optional)
Preheat oven to 350 degrees F (180 degrees C). Lightly grease a 10 inch round or cast iron pan.
In the prepared pan, mix the cherries, brown sugar, and cornstarch together until the sugar and cornstarch dissolves. Evenly pour the brandy over the top. Bake for 20 minutes.
Almond Crumble
4 tablespoons (60 grams) butter, room temperature
1/4 cup (50 grams) brown sugar, packed
1/2 teaspoon ground cinnamon
1/4 teaspoon salt
1/2 cup (60 grams) all purpose flour
1/2 cup (45 grams) old fashioned oats
1/2 cup (60 grams) sliced or chopped almonds
In a large mixing bowl, beat together the butter and sugar. Mix in the cinnamon and salt. Stir in the flour, oats, and almonds. The mixture should hold together in your hand when squeezed together. When the cherries have finished baking, evenly sprinkle the crumble over the top. Bake for an additional 20 minutes.
Serve warm or chilled, with ice cream or whipped cream. Keep chilled in the refrigerator.
  
recipe adapted from Pastry Affair

PS...Ice cream it's mandatory!